The miracle of Peanut Butter

Difficulty: Easy
Time: 20 mins to roast nuts, 10 mins to process
Plastic saved per year: about 12 1kg plastic containers
What’s the catch?: For this to be completely plastic-free, you’ll need to buy the peanuts from a bulk food store – and fill your own container.

Skip to recipe        Skip to pictures

You have possibly never thought of peanut butter as miraculous.  Fair enough, neither had I until I made my own.

There are a couple of miracles in fact.  The first is that the ingredients needed to make peanut butter are: peanuts.  Just peanuts, nothing else.  It is a common misconception that oil is added as the finished product is clearly oily, but no.  The oil you see is peanut oil released from the nuts during processing.

The second miracle is that a pile of dry-looking nuts can transform into a decidedly wet-looking butter.  And the first time you try it, I can promise you will be incredulous.

The process in simple enough: roast the peanuts, allow them to cool, then process until they turn into peanut butter.  Job done.  The trick is to have patience as the peanuts-to-peanut-butter transformation does not occur instantly, in fact it takes about 10 minutes.   When processing, the peanuts first turn into a meal-like consistency.  Then they are more like breadcrumbs, but still dry and very unlike butter. At this point you are likely to feel quite skeptical, but keep going!  It is such an unlikely process that you can scarcely believe it possible, but if you keep the processor on and just wait, magic happens.

From peanuts to peanut butter in pictures


IMG_2614After roasting, allow your peanuts to cool.  Then get your helper to transfer them to the food processor.

peanut crumbleAt first all you get is crumbled peanuts.

IMG_2616

IMG_2617 IMG_2618

Looking better now, but still not there.

IMG_2619 IMG_2620

Almost…..

IMG_2622

And done!  Now to add some crunch…

IMG_2623

To make crunchy peanut butter, add some peanuts you reserved for this purpose.

IMG_2624

Pulse and few times…et voila!  Crunchy Peanut Butter.

IMG_2627

In the jar….

IMG_2625

…and back to my helper for quality testing.


Recipe

1kg raw blanched peanuts

Roast peanuts in a baking dish at 180C for about 30 mins, or until lightly browned, stiring occasionally.  The longer your roast the nuts, the darker your finished peanut butter will be.  Allow to cool.

If you like your peanut butter crunchy reserve half a cup of roasted nuts.  Put the rest in the food processor and process on high until the peanut butter forms.  This will take about 10 minutes.

Add in the reserved nuts and pulse a few times until the desired level of crunchiness is achieved.

Spread thickly on fresh bread and enjoy.


Meat without plastic

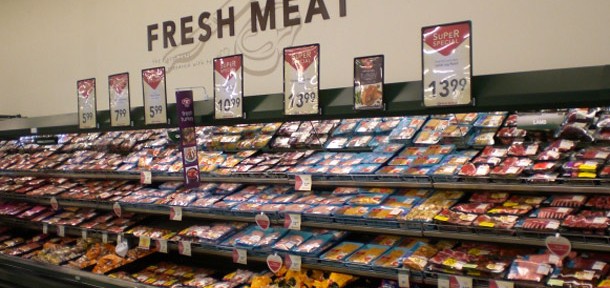
The Problem

One of my biggest stumbling blocks has been how to buy meat without plastic.  Sausages, chops, steak..you name it, it comes wrapped the same way in every supermarket in the country.

Meat in plastic

In today’s world plastic is obligatory when you buy meat .

Whole chickens only come in plastic bags.  Fresh fish over the counter?  At New Word they offer a one-size fits all paper/plastic/foil laminate bag which is wholly non-recyclable and for most purchases more packaging that is needed. Independent butchers somewhat better in that If you buy something over the counter you at least avoid the polystyrene tray, but they still put the item in a plastic bag.  Of course they do, what other option do they have?

It is quite a price to pay every time I tuck into spaghetti bolognaise,  roast chicken or bbq steak.

PET meat tray

New World’s new recyclable PET meat tray will reduce the amount of waste going to landfill.

New World have improved the situation recently by being the first supermarket in the world to develop a recyclable PET meat tray.  It does feel a lot better being able to recycle the tray and only put the wrap in the rubbish, and this solution must already being having a positive effect on landfill volumes.  But, and there is a but, none of this thinking reduces the demand for plastic. It doesn’t challenge the need for plastic or encourage people seek alternatives. So I am trying to avoid all plastic meat packaging, recyclable or not.


The Alternative

I did some research and finally stumbled upon an alternative:  bring your own containers.  Why had I never thought of this before? Bring them to the supermarket, to the butcher.  Have them tare it on the scales, pop the item in.  Boom.  Just like that.  Now all you have to do is take that container home and pop it directly into the freezer.  Brilliant!

Much encouraged by this idea, I took myself off to Briscoes and invested in two Anchor-Hocking glass containers with airtight lids which, wonderfully, can be put in the freezer.

I have had success at New World in New Lynn where, after some discussions with this manager and that manager, I was allowed to purchase fish and have it placed directly into the container.  I was so happy about this, what a win!  However the meat they offer over the counter tends to be their expensive, top-of-the-range stuff rather than the mince, drumsticks and sausages that make up our standard shop.  So sadly on this occasion I was obliged to accept the standard packing options for the rest of the meat shopping.

Salmon is a rare treat!

Fish bought from New World, the chicken breasts from Clark’s Organic Butchery.

This has made me look further afield and to venture into butchers in the area.  So far I have been to The Aussie Butcher in New Lynn, Clark’s Organic Butchery in Glen Eden and even further away, Westmere Butchery in, well in Westmere.  I think there is likely to be a Mad Butcher out this way that I have not yet discovered.

I’m happy to report that all three accepted my glass containers.

Clark’s have a wonderful range, though I’m still smarting at the higher prices you pay for organic meat.  Moving to organic is something I’m considering, pending further research.  I have to say I do balk a little at the prices but I can’t deny their product is of the highest quality and no doubt is better for us and the planet.  I figure perhaps it would be better for our family if we ate a little less meat of better quality or had one or two vegetarian dinners each week so we better afford it, and I have to say I don’t have the family’s full support in this ‘reducing meat’ proposal so I’m not sure we’ll be making the shift just yet.   Clark’s also make their own bacon and while they vacuum package most of it they offered to let me know when they make it so I can go it and buy some plastic-free.

The Aussie Butcher offers most of their produce pre-packaged in the usual way, and only a small selection over the counter.  So less options here.

Westmere Butchery is a good middle ground, offering a fantastic selection of meats over the counter and, being non-organic, at a more moderate price, the only shame is that they are the furthest away!  Notwithstanding that, it is a wonderful shop which is always packed with customers irrespective of the day of the week.

Challenges

I still have some challenges even with this new BYO container approach:

– So far I have only have two containers and as was evident today, this is not enough when buying meat for the week.

– The glass is surprisingly heavy.  Glass is great in many ways as it goes straight in the freezer, then you can easily sit the container in hot water in the sink to defrost but carrying two to the butcher and getting them filled was almost enough!  This is an annoyance, but I’m prepared to work with it

I can't fit this in a glass container.

Meat products such as whole chickens or other roast cuts are still a challenge to buy without plastic.

– Glass containers are not the solution for all meat purchases: I don’t think I can get a container big enough to accommodate a whole chicken or a leg of pork or lamb.  I’d be happy for the meat to be wrapped in wax paper, then in plain paper as they used to once upon a time, but no-one does this these days.  So more work to do here.

So there you have it.  That is where I’m up to with buying meat without plastic.

RSG


Homemade pasta

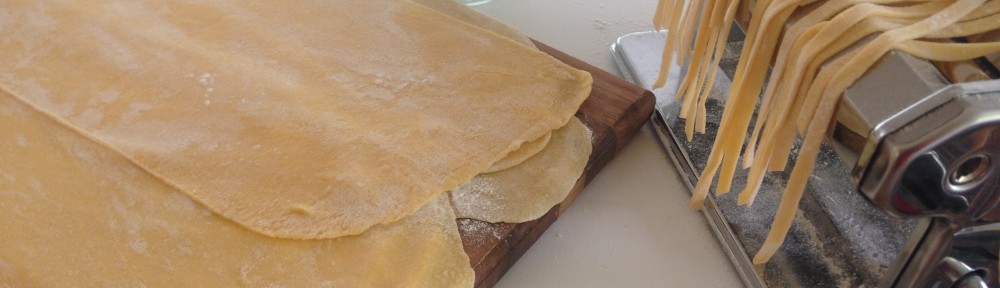
Today’s packaging-saving effort was making my own pasta.

As a family, we eat our fair share of pasta.  Dried pasta is quick, easy and relatively affordable.  Of course, it inevitably comes in plastic packaging, and that is the issue. I would be very happy to buy dried pasta in bulk if I was able to, but as yet I have not found a bulk-bin shop that offers it.  So the only alternative is to make it at home.  Which is all well and good, but this renders it into a much more time-consuming task.

Today this was possible as I had more time on my hands than usual, being stuck at home unwell.  So off I went.

I am the proud owner of a pasta-maker that has not been used around 5 years at a guess.  That’s how long the kids have been around.  So out of retirement it came for my pasta making effort.

I used this recipe that came with the machine, but I made a 3/4 recipe using 3 eggs and 375g flour.

Ingredients

  • 500g flour
  • 4 eggs

Method

Place flour in a bowl.  Make a well in the centre and break the eggs in.

Mix with a fork until combined.  If too dry, add water.  If too wet, add flour.

Knead on a floured bench with your palms until completely homogeneous.   A good dough will not stick to your fingers.

And that’s it, that’s all it takes to make the dough.  I kneaded it for about 10 minutes to achieve a smooth consistency.  After that, you slice approximately 1-2cm slices and, starting on the fattest setting, start to roll out your pasta.  I was making lasagna, so all I needed was flat pasta sheets.  It turned out I had a wee of dough left over, so I make that into fettucine.  I had the meat sauce cooking while I made the pasta.  Here’s some pics of the process:

Cut dough in 1cm thick slices.

Roll it on increasingly thinner settings until the desired thickness is reached. For me, this was the thinnest setting but one.

Roll it on increasingly thinner settings until the desired thickness is reached. For me, this was the thinnest setting but one.

The final rolling.

The final rolling.

Cutting a rolled past sheet into fettucine.

Cutting a rolled past sheet into fettucine.

Homemade pasta. Slower, but less waste. not to mention cheaper.

The finished product.

I made my lasagna a couple of hours later, it was delicious!  The fettuccine I left to dry for 5 minutes then floured and wound into four little nests, popped them in a plastic bag (yes plastic, but at least re-use!) and then into the refrigerator for use the next day.  I’m also experimenting with freezing a couple of the nests, so I’ll see how well that works.

I’d love to say that I’ll make my own pasta from now on in, but I’m not sure how practical this will be for me as a working mum.  I work three days a week, and pasta is a great standby if I have meatballs already made.  I would have to make it in advance, and freeze it ( if this works).  Another option might be to made the dough on the weekend and pop it in the fridge: making the dough is the time-consuming part.  Then all I’d have to do is to roll it and cut it on the day.

Alternatively if anyone knows of a place I can buy bulk pasta, I’d be keen to know about it. 🙂

Dear Sanitarium

Today I sent this email to Sanitarium.  We are a big fan of Weet-Bix but now I have guilt over the fact that the box is lined with plastic.

Weet-Bix


Dear Sanitarium,

Like most good Kiwi kids, I was raised on Weet-Bix. I now have young children of my own and they love Weet-Bix too. I have just one concern: I am currently unable to purchase Weet-Bix without acquiring a non-recyclable plastic bag, the one that is used as a box liner.

This issue has arisen as I am undertaking an exercise to reduce my family’s waste, and especially of single-use plastic bags. With this goal in mind, placing a box of Weet-Bix in my trolley now comes with the guilt of knowing I’ll have to ‘throw away’ the plastic liner. And as you know, there is no ‘away’.

I understand the liner helps keep the product fresh: such is the case with much of today’s packaging.

It is also true that plastic, and non-recyclable plastic bags such as these, are the cause of much marine contamination and kill many birds, fish, and other wildlife, not to mention plastic therefore is finding its way into the food chain, of which we, as people, are a part. The long term implications of continuing on this path are frightening.

Placing a box of Weet-Bix in my trolley now comes with the guilt of knowing I’ll have to ‘throw away’ the plastic liner.

While I can see that there are many other single-use plastic bags out there that vastly outnumber those in Weet-Bix packets, the fact remains the ones in your product are plastic and cannot be recycled, so contribute to the greater environmental problem.

I am interested to know how Weet-Bix used to be packaged, prior to the advent of the ubiquitous plastic bag? Also is this product available in bulk somewhere so that I might fill my own container?
And finally, I’m keen to learn what your plans are to address non-recyclable packaging, are there any alternatives?

Thanks in advance for your consideration of this enquiry.

Kind regards,
Rochelle

If I gain Sanitarium’s permission, I will post their reply.
R

Homemade Yoghurt

In the last month or so I have had a revelation: You don’t need a yoghurt maker to make yoghurt.  Alright, I guess you knew this, or at least suspected it; after all, people have been making yoghurt for thousands of years without them.  But how?  And isn’t it difficult?

My last two batches of yoghurt have been made in a casserole dish wrapped in a towel, without the need for a yoghurt maker or the sachets of yoghurt mix.  It made beautiful thick, pure, unadulterated yoghurt.   I have been duped by the producers of yoghurt makers into believing that making yoghurt without their product was hard.

It is not. It is dead easy.

Here is my yoghurt journey.

The EasiYo Promise

I have been interested in making dairy products at home, yoghurt in particular for many years.  When a product came on the market to enable you to easily make your own yoghurt at home I was sold, and EasiYo yoghurt maker took up residence in my kitchen.   I was impressed with the system on several counts:

  • Quality – I was very taken with the quality of the yoghurt produced as it was free from the additives that are in many commercial yoghurts.
  • Economy – it cost slightly less to make yoghurt this way, costing $4.29 per kg with EasiYo, compared to paying $5.99 for the same amount of Fresh’n Fruity
  • Reduced waste – This was a big win for me.  One little sachet per 1000mls yoghurt seemed a lot less waste than the big single-use plastic tubs, or worse the single-serve tubs.

And so I proceeded to buy the little sachets of milk powder and culture required to make ‘homemade’ yoghurt.

I liked the product, it tasted good.  There was just that little nagging reservation every time I put one of the plastic/foil sachets in the rubbish bin…’this is going straight to landfill…‘.  Also there was a suspicion that buying a sachet of milk powder and mixing it with water did not really constitute ‘homemade’ yoghurt.  Didn’t making yoghurt start with fresh milk?

Revelation 1 – Making yoghurt from milk

A couple of years back I joined a local raw milk co-operative and instantly had a continuous supply of wonderful, creamy, natural milk.  It was the ideal time to try making yoghurt from directly from milk.  I looked up recipes and asked around my friends for ideas or experience.  And very soon, my EasiYo was in use making genuine homemade yoghurt.  All it took was this:

  • searing one litre of milk by bring it gently to about 85C,
  • letting it cool to about 40C
  • stirring in a teaspoon of active yoghurt, either from my previous batch or storebought if my last batch was more than a week old.
  •  Pouring the warm milk + culture into the Easiayo container, and following standard EasiYo instructions.

Et voila!  Overnight I had made some real yoghurt from raw milk, without any waste. I was thrilled.

Revelation 2: Making Greek Yoghurt

I made my yoghurt from milk every week.  It was not as creamy as store-bought varieties, and while I was full of self-congratulations for getting this far, I wasn’t as happy with the result.  I secretly still preferred the commercial varieties, but was resolute about sticking to my waste-free, genuinely homemade method.  Again I felt I was doing something wrong, that there had to be a way to produce a thicker yogurt at home.  Then I stumbled upon this video about making Greek yoghurt from the website Salad in a Jar.  Another revelation.  what was needed was to strain my yoghurt to remove the whey, leaving it thick, smooth and creamy.  Every bit as good as store-bought.

The video recommends using a chinois – a fancy, ultra-fine sieve – but a little research revealed that these were about NZD90, rather more than I wanted to invest on (at that point) an experimental new method.  Instead, I used my normal kitchen sieve lined with  cheesecloth that I bought years ago from Spotlight’s material and fabric department.  Much cheaper and just as effective.

So now after making my yoghurt I strained it for about 45 minutes.  Actually, as I had only one sieve and had to do it in two batches, it took a total of 1.5 hours.  But it’s a set and forget thing, you don’t have to sit there watching it, you can just get on with other things while it is draining.

My family loved the resulting yoghurt.  You can add sugar or flavours such as vanilla essence at the same time you add the yoghurt culture, I am just making the plain, unsweetened variety.  My 2 year old loves it and will have three helpings after dinner if I let him.

Revelation 3: Bye by EasiYo

My latest revelation is that the EasiYo is not required for this process at all.   You can make yoghurt just fine using a glass bowl or casserole dish.   I knew it had to be possible to make yoghurt without one, but recipes all talked about putting the dish in a warm place for 12 hours.  I imagined I needed a hot water cupboard, and as I didn’t have one it seemed unlikely this ‘no EasiYo’ method would work for me.  Also up until I learned to make Greek yoghurt there was no impetus to change: the EasiYo made 1 litre of yoghurt and that was good for us for a week.  However when making Greek yoghurt naturally, the yield is not quite as good as you are straining out the whey.  So I was getting roughly 600mls of greek yoghurt for each 1 litre batch I made.  Not only was supply down but demand was up as it was so popular with the family.  I needed to scale production, and the EasiYo was the bottleneck.

So I doubled my recipe to 2 litres of milk, cooled it as usual and poured it into a ceramic casserole dish with a lid.  Then i wrapped an old towel around it, popped it in the cold oven, and let the cultures do their magic.  12 hours later I was incredulous at the sight of the casserole dish full of beautiful yoghurt.  How could it be this easy?  How do we, as a generation, as a culture (excuse the pun) not know this process is so simple?    I strained it – now operating two cheesecloth lined sieves simultaneously for efficiency, and was rewarded with a full litre of thick creamy Greek yogurt for the princely sum of $3.

EasiYo have done very well with their product and marketing: that is what companies do.  But what the Earth needs is not to be told’ you can’t make this with out our products, which by the way generate non-recyclable watse’, but rather ‘here is how you make real yoghurt, from scratch.  With zero waste’.  Only this line of thinking is not as profitable.

My EasiYo’s days are now numbered.  It is still up in my cupboard but I feel it will soon be making a one way trip to the op shop.


Being clear about no plastic when shopping

Today was both exciting and frustrating.

It was exciting because today I put two new resolutions into action:  the first is to buy bread from the bakery to avoid  the plastic bags supermarket brands come in, and the second is to bring my own containers to the butcher and get them to put the meat directly in, neatly avoiding polystyrene trays and the cling film wrapping.  But both purchases had challenges.

Bread – going plastic free

We have been a Molenberg family for a long while, but since Molenberg don’t offer any alternative to plastic packaging, this had to change.  I made my first Baker’s Delight wholemeal loaf purchase last weekend.  They sliced it in their fancy slicer (‘sandwich slice please’) and were happy to wrap it in a paper bag, which I requested. In fact, I got the idea that a paper bags was the standard way of wrapping their bread.  Result!  It is very good bread to boot:  a lovely firm crust and soft inside, the family were hooked. And at only $4 for a sizable loaf it is also good value.  So when we used that last of the loaf at breakfast this morning, I put purchasing another loaf on my to do list for the day.

Today I requested the same wholemeal loaf and asked for it to be sliced, but kind of assumed it would come in paper and hence neglected to request a paper bag. And while I was busy eyeing up the twisty buns, the lady serving had efficiently sliced the loaf and popped it into a plastic bag. Gah!  I belatedly explained that I was aiming to avoid plastic upon which she immediately offered to swap the plastic bag for a paper one. When questioned, she admitted she would not reuse the bag for another customer, but instead would throw it away. When she realised this was not going to make for a happy customer either, she resolved the problem by slicing me another loaf and wrapping it in a paper bag with the promise that she would be able to sell the plastic-wrapped one to another customer.  She almost managed to put the loaf into a plastic carry bag too, but I stopped her in time.  All done with a smile I must add. Well done Baker’s Delight.

Meat – going plastic-free

Buying meat has been one of my bugbears: how do you avoid all that plastic packing?  And although New World has done a fantastic job in developing a completely recyclable meat tray, meat still comes with the inevitable cling wrap.  What to do?  I stumbled across the answer online: use freezable glass containers.  Pyrex does a ‘Heat & Store’ range which is freezer safe glass with plastic lids, and are available at Briscoes.  I went to Briscoes and ended up buying a couple of dishes made by the US company Anchor Hocking, who offer the same type product but with clear lids called TrueSeal Food Storage. And although the lids a plastic but I see this as saving many single-use plastics in its lifetime. I bought a couple of differing sizes to get me started.

Will these containers be the end to plastic-wrapped meat for our family?

Anchor Hocking TrueSeal Food Storage containers, purchased from Briscoes.

So I turn up to the Aussie Butcher with my glass container and explain my plastic-avoidance preference to the lady serving.  I ask for 10 sausages, and before I could stop her she has grabbed a plastic bag and headed out the back to get them.  I suspect she found my subsequent remonstrations confusing and almost laughable, so I quickly accepted the offered bag, popped it in the container and promised myself I’d do better next time. At least I avoided the polystyrene tray.

The cause of frustration in both of these interactions was all me:  I failed to adequately communicate my position and how I would like the product to be packaged.  I have to confess that this is in part due to a level of self-consciousness:  I’m aware I am bucking the trend, stepping away from what is considered to be normal, so I my requests did not come out as clearly as they should have.

I will get better at this. And the more I do it, the less self-conscious I will become.